Urban Worm Company
Urban Worm Bag - Version 2 Composter
Urban Worm Bag - Version 2 Composter
- Regular price
- Price: $139.00
- Regular price
- List Price:
- Sale price
- Price: $139.00
- Unit price
- / per
Notify me when this product is available:
Couldn't load pickup availability
 PRODUCT DESCRIPTION
Description:
Urban Worm Bag Version 2 with fully removable zipper-free bottom!
Create organic fertilizer inside or outside your home or apartment using nothing more than common household waste like newsprint, cardboard, and food waste.
How Continuous Flow Works
Continuous flow worm bins allow for worm-free harvests. There is never an emptying of the Urban Worm Bag.
- The top layer of the Urban Worm Bag features freshly-added food waste and bedding. Worms tend to stay near these top layers.
- Decomposition by worms and microbe continues in the middle of the Bag.
- The bottom of a mature Urban Worm Bag features ready-to-harvest worm castings that will be ready for use in your garden or grow operation. Worms keep working in upper layers so there should not be a need to separate them out.
Key Features:
Your Urban Worms Bag will arrive with 12 male tubes, 8 short female tubes, 4 long female tubes, 8 corner connectors, and an instruction manual.
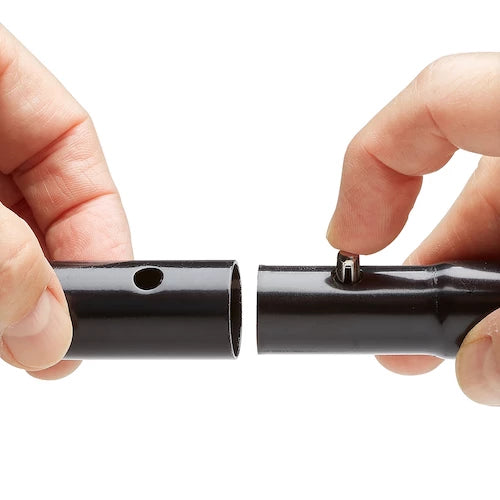
CONNECT THE TUBES
Connect the 12 male tubes to each of the female tubes. This will create 4 vertical supports and 8 shorter horizontal supports.
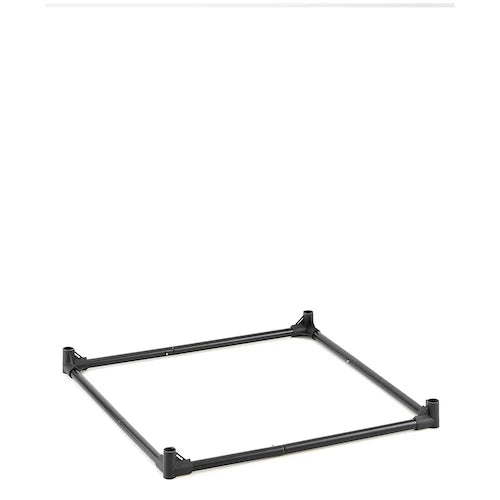
CREATE THE BASE
Connect 4 shorter horizontal supports with your plastic 3-way connectors.
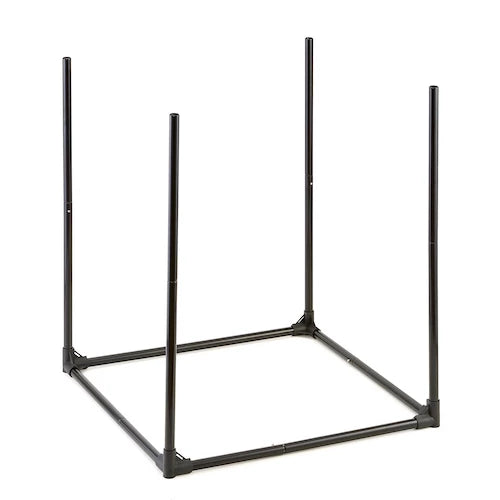
INSERT VERTICAL SUPPORTS
Insert your 4 longer vertical supports into the bottom 3-way connectors.
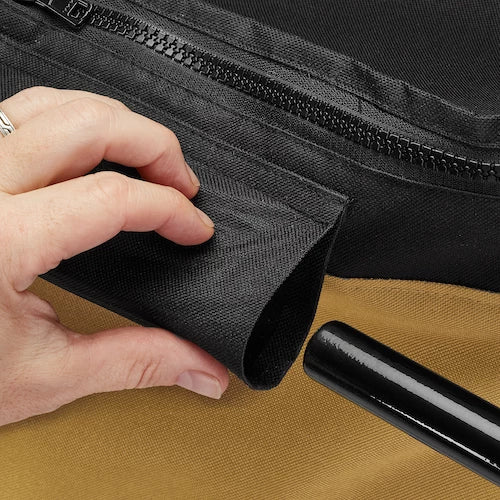
INSERT TUBES INTO URBAN WORM BAG
Insert horizontal supports through the fabric tunneling on the Urban Worm Bag. Connect with plastic 3-way connectors.

PRESS BAG ONTO VERTICAL SUPPORTS
This completes your assembly!
GET TO WORK!
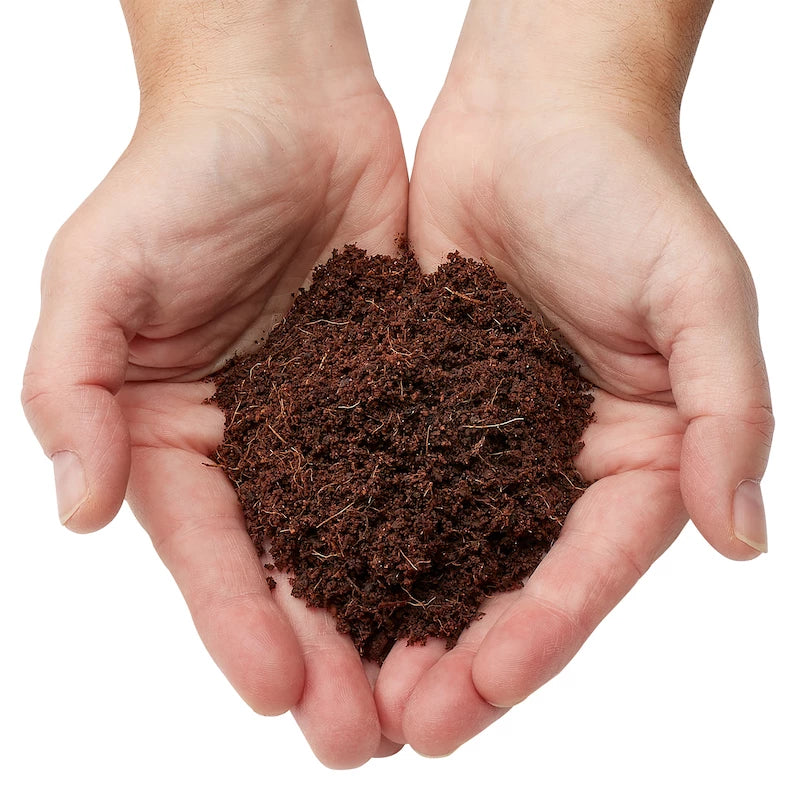
Start your Urban Worm Bag with two bricks of low-salt Urban Worm Coco Coir or other form of carbon-rich bedding like shredded cardboard, paper, peat moss, or a combo!
Additional Details:
Can you collect tea from Urban Worm Bag?
- A properly-run Urban Worm Bag should not be producing excess liquid, which is actually called "leachate". But If you collect this liquid out of the bottom, just operate the Urban Worm Bag with the bottom fully removed and place a tray underneath to catch it.
Do I need tools to assemble the Urban Worm Bag?
- No. Assembly is simple. No tools or glue are needed.
How big is the Urban Worm Bag?
- When fully assembled, the Urban Worm Bag is 27.5in x 27.5in x 31in. It is a large worm bin when compared to most other worm bins.
https://www.youtube.com/watch?v=Z1x_B1k2TT8
https://www.youtube.com/watch?v=W1T9Tsc9JAo
https://www.youtube.com/watch?v=ZD33aCmeds0
Turning Food Waste Into Food for the Soil
Any worm bin needs time for the worm and microbe ecosystem to develop.
In the first few weeks, be very conservative with your feedings, adding only a cup or two each week until you see the waste is being broken down easily.
Stop adding food waste and add bedding if you encounter foul odors, gnats, or fruit flies.
Stick with non-dairy, non-meat food wastes.
Worms love banana peels, apple cores, all sorts of melons & nearly all vegetable waste.
Food waste is incredibly high in water content, so make sure to add dry bedding with each feeding. For a feeding, we recommend 2x the volume of bedding to food waste.
Some users like to layer their food waste and bedding. Others like to mix them together.
Pssst....we like to mix them together!
IT'S HARVEST TIME!
After 4 to 6 months *and* when your Urban Worm Bag is about 75% full, it's time to harvest! Remove the patented bottom of the "UWB" and get those castings!
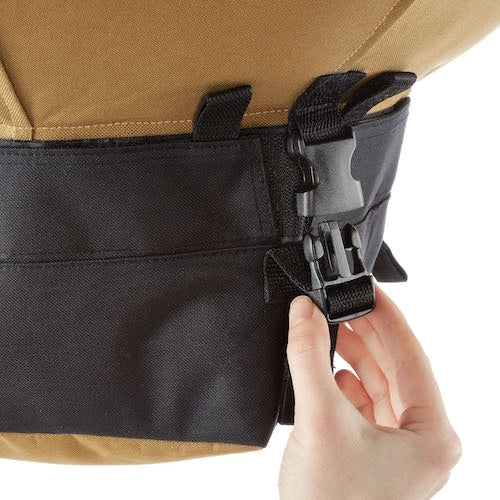
RELEASE BUCKLE
Simply release each of the 8 buckles on the bottom of your Urban Worm Bag.
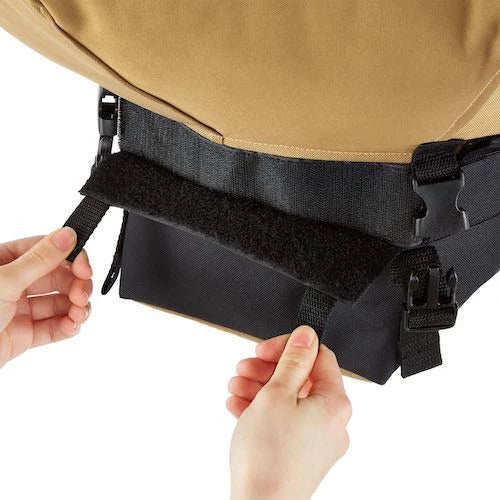
REMOVE VELCRO
Simply pull on the bottom of each of the 4 Velcro tabs on the bottom to fully remove the bottom.

LOOSEN THE DRAWSTRING
This will open up the interior liner. (Don't worry...everything won't fall out!)
Remove the patented bottom and place underneath the Urban Worm Bag to begin harvest. Hint....bumping the sides helps to loosen compacted vermicompost!
Your first harvest may be very wet, maybe a little wormy, and will contain unprocessed bedding. Just send that material back into the top!
Subsequent harvests will have better texture and should be worm-free.
Use castings as a top dress, a side dress, or mix into growing media at a 10% substitution rate, by volume.
The microbes will help cycle nutrients, aid in water retention, promote faster germination, suppress pests and pathogens, and will simply feed your soil.
Your garden or grow operation will thank you!
Share
Great reasons to buy from us:


